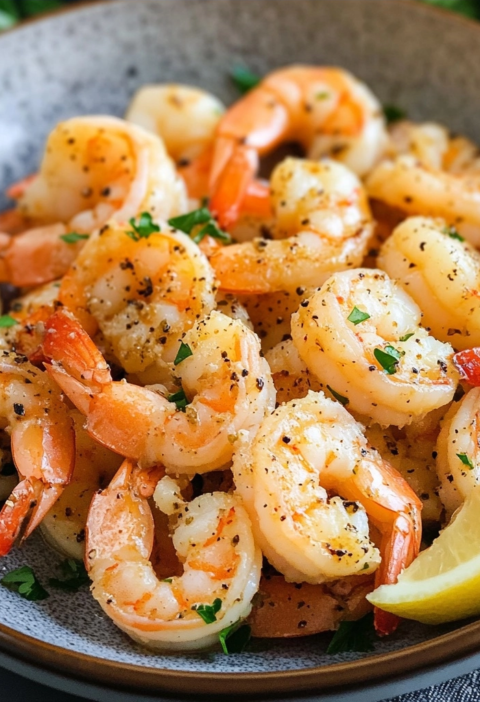
Coconut Shrimp is a classic appetizer featuring succulent shrimp breaded with sweet flakes and deep-fried to golden perfection. This dish offers a delightful combination of textures and flavors that pairs beautifully with tangy dipping sauces. You can serve this popular snack at parties or as a special meal addition for any occasion.
| Detail | Information |
|---|---|
| Prep Time | 30 minutes |
| Cook Time | 15 minutes |
| Total Time | 45 minutes |
| Servings | Serves 4 |
| Difficulty | Medium |
| Cuisine | Seafood |
| Category | Appetizer |
| Method | Frying |
Why This Recipe Works
This Coconut Shrimp recipe succeeds because the batter adheres firmly to the shrimp while the coconut creates a crunchy exterior. The balance of sweet and savory notes ensures that every bite remains interesting and satisfying for all types of diners. You will find that the method allows for consistent results even if you are new to deep-frying seafood at home.
The specific ratio of flour to liquid creates a thin batter that coats the shrimp without becoming thick or doughy. This texture allows the coconut flakes to adhere directly to the protein surface, creating a uniform golden layer when fried. The timing of the fry ensures that the shrimp cooks through without becoming tough or rubbery during the process.
Refrigerating the coated shrimp before cooking helps the batter set so it does not fall off in the hot oil. This technique adds structure to the coating and ensures the final product looks polished and professional before serving. The result is a snack that retains its heat for a longer period and stays crispy longer than typical versions.
Chef Tips for Perfect Results
Follow these expert tips to achieve the highest quality coconut shrimp with a perfect crunch every time you cook.
- Maintain oil temperature: Keep your oil at 350°F to prevent the coating from absorbing too much grease or burning.
- Use non-alcoholic beer: Since the original recipe calls for beer, substitute with a quality non-alcoholic lager to avoid alcohol.
- Dry shrimp well: Pat the raw shrimp dry before coating to ensure the batter sticks securely to the surface.
- Work quickly: Fry the shrimp in small batches so the oil temperature does not drop too much.
- Use separate bowls: Keep your flour, batter, and coconut in distinct bowls to avoid cross-contamination.
- Drain well: Place cooked shrimp on wire racks or paper towels to remove excess oil immediately.
- Chill before frying: Refrigerate the coated shrimp briefly to set the batter before placing them in the oil.
- Don’t overcrowd: Adding too much shrimp at once will lower the heat and make them soggy instead of crisp.
Common Mistakes to Avoid
Many cooks make predictable errors that ruin the texture and flavor of this dish when preparing it from scratch.
| Mistake | Why It Happens | How to Fix It |
|---|---|---|
| Soggy coating | Oil temperature is too low | Use a thermometer to ensure oil is 350°F before adding shrimp. |
| Coating falls off | Shrimp were too wet | Pat the shrimp dry with paper towels thoroughly before breading. |
| Burnt exterior | Oil is too hot | Lower the heat slightly and cook for a longer duration if needed. |
| Batter too thick | Too much flour added | Adjust liquid ingredients to achieve a thin, pouring consistency. |
| Nutrition imbalance | Heavy frying | Drain on racks and serve with lighter vegetable sides. |
| Undercooked center | Rushed frying time | Ensure shrimp turn opaque and reach safe internal temperature. |
| Greasy texture | Poor oil management | Use fresh oil and maintain consistent heat throughout cooking. |
Variations and Substitutions
Feel free to adjust the ingredients to suit different dietary needs or flavor preferences while keeping the signature taste.
| Ingredient or Element | Substitution or Variation | Impact on Flavor or Texture |
|---|---|---|
| All-purpose flour | Gf rice flour | Creates a naturally gluten free texture for sensitive eaters. |
| Egg | Beaten egg white | Makes the dish slightly lighter while binding well. |
| Beer | Non alcoholic beer | Provides carbonation without any alcohol content. |
| Flaked coconut | Grated fresh coconut | Offers a more intense tropical aroma and texture. |
| Shrimp tails | Removed tails | Changes eating style to finger food without handles. |
| Fresh coconut | Desiccated coconut | Provides a crumbly texture ideal for coating. |
| Vegetable oil | Avocado oil | Increases the nutritional profile and smoke point. |
| Baking powder | Self rising flour | Reduces dry ingredients but changes leavening slightly. |
| Seasoning | Garlic powder | Adds savory depth to the otherwise sweet profile. |
Serving Suggestions and Pairings
Serve this Coconut Shrimp with complementary sides and sauces to elevate the meal experience for your guests.
- Warm marinara dipping sauce for a tangy kick.
- Spicy cocktail sauce to add a spicy contrast.
- Cold beer or lemonade as a refreshing beverage.
- Light cabbage slaw for a crunchy vegetable side.
- Fresh garden salad to balance the richness.
- Diced pineapple chunks to enhance tropical flavors.
- Cheese dip for a creamy textural contrast.
- Steamed jasmine rice to make it a full meal.
- Green onion garnish for visual appeal.
- Crusty bread rolls to soak up extra sauces.
- Roasted sweet potatoes as a hearty complement.
- Tartar sauce for a traditional pairing option.
Imagine a complete plate featuring these golden shrimp alongside a colorful garden salad and a glass of iced tea for a summer evening meal. The combination of crispy seafood with fresh greens creates a delightful dining experience that feels both indulgent and fresh.
Make Ahead Options
It is possible to prepare this Coconut Shrimp recipe ahead of time to save effort during busy weeknights or parties. You can coat the shrimp and keep them in the refrigerator for up to 24 hours before cooking to ensure they are ready to fry immediately.
Storage and Reheating
Proper storage techniques are essential for keeping leftover coconut shrimp safe and tasty throughout the week.
| Method | Duration | Instructions |
|---|---|---|
| Room Temperature | 2 hours | Store in a covered dish in a cool area away from sunlight. |
| Refrigerator | 3 days | Place in an airtight container and keep at 40°F or below. |
| Freezer | 2 months | Wrap individually and store in heavy duty freezer bags. |
| Reheating | 15 mins | Use an oven at 375°F to restore crispiness and texture. |
| Make Ahead | 24 hours | Coat shrimp and refrigerate without cooking until needed. |
Nutritional Information
Approximate values are based on one serving and may vary depending on exact ingredients and portion size.
| Nutrient | Amount per Serving |
|---|---|
| Calories | 350 |
| Protein | 22g |
| Fat | 20g |
| Saturated Fat | 5g |
| Carbohydrates | 18g |
| Fiber | 2g |
| Sugar | 1g |
| Sodium | 400mg |
Frequently Asked Questions
Can I substitute the beer in the recipe?
You can easily substitute the beer with a non alcoholic lager to remove the alcohol content completely. This substitution retains the carbonation that helps the batter become light and airy during frying. It is also an excellent option for children or those who avoid alcohol entirely.
How do I know when the shrimp is fully cooked?
The shrimp is fully cooked when the coating turns golden brown and the meat turns completely opaque. This visual cue indicates that the protein has reached the safe internal temperature for consumption. Use a thermometer to confirm the center reaches 145 degrees Fahrenheit for safety.
Why is my coconut shrimp sticking to the pan?
This often occurs if the oil is not hot enough or the shrimp were not patted dry before coating. Ensure you have cleaned the oil surface of any excess flour before adding the shrimp to prevent sticking. A hot oil bath is the key ingredient for a non stick frying experience.
Can I freeze the batter coated raw shrimp?
Yes, you can freeze the raw shrimp after they have been coated with batter and coconut flakes for later use. Place them on a tray to freeze individually before transferring to a freezer bag to prevent clumping. Thaw in the refrigerator before frying for the best texture results.
What dipping sauce works best with these shrimp?
A spicy cocktail sauce or a sweet and sour sauce complements the sweetness of the coconut flavor well. Both options provide a nice contrast that enhances the savory profile of the fried shrimp itself. You can also try remoulade for a creamy and tangy alternative.
How do I keep the shrimp crispy after cooking?
Store them on a wire rack instead of paper towels to allow air to circulate and prevent moisture buildup. This method prevents the bottom from becoming soggy while the shrimp are still warm. Reheating in the oven also helps restore the crunch effectively.
Conclusion
This Coconut Shrimp recipe delivers a restaurant quality experience right in your own kitchen with simple steps. The sweet coconut combined with savory seafood creates a memorable dish that everyone will enjoy. We encourage you to try this recipe and experience the delightful crunch of perfectly fried shrimp yourself.
Coconut Shrimp Recipe: Sweet, Crispy, Fried Shrimp Snack
Ingredients
Method
- Pat shrimp dry with paper towels
- In separate bowls: flour + salt mixture
- egg-beer dip
- coconut flakes
- Working in batches: coat shrimp in flour, dip in egg-beer mixture, press into coconut flakes
- Transfer to tray, cover with plastic, refrigerate 30 minutes
- Heat oil to 350°F in deep fryer
- Fry shrimp in small batches 1-2 minutes per batch until golden
- Transfer to paper towel-lined plate to drain
- Serve warm with dipping sauce
Nutrition
Notes
Chilling prevents coating from falling off
Fry in batches to maintain oil temperature
Add potato starch to flour for extra crunch
Shrimp will continue cooking after removing from oil