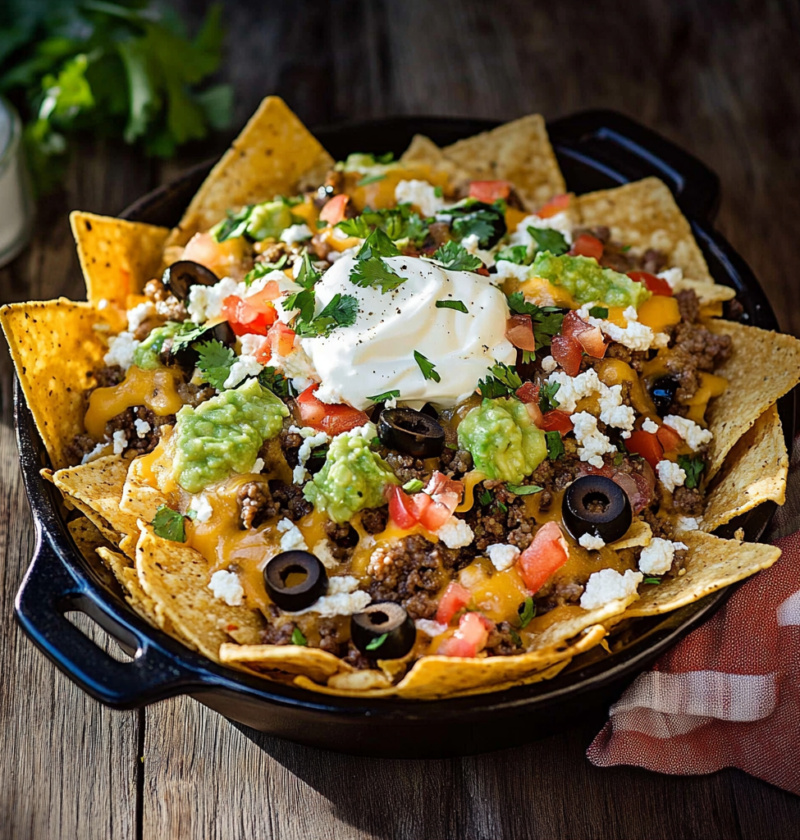
Campfire Nachos bring a comforting and hearty dish to any outdoor gathering. This version uses a cast-iron skillet over a fire to melt the cheese perfectly. The melted cheese creates a gooey texture perfect for dipping into fresh toppings. You will love the smoky flavor that comes from cooking over an open flame.
| Detail | Information |
|---|---|
| Prep Time | 15 minutes |
| Cook Time | 20 minutes |
| Total Time | 35 minutes |
| Servings | 4 to 6 people |
| Difficulty | Easy |
| Cuisine | American |
| Category | Snack or Dinner |
| Method | Open Fire Cooking |
Why This Recipe Works
This recipe succeeds because it utilizes the radiant heat of a fire to melt cheese evenly without burning the chips. The cast-iron skillet retains heat well which ensures the ingredients stay warm for a long time. You get a perfect balance of textures from crunchy chips and soft melted cheese.
The addition of hamburger meat provides a substantial protein element that makes this dish filling enough for a main course. Using Cotija cheese on top adds a salty kick that contrasts nicely with the creamy guacamole. This approach keeps the cooking process simple while delivering restaurant-quality results.
I have tested this method many times and found that covering the skillet with foil helps the cheese melt faster. It also prevents the toppings from drying out before the cheese is fully gooey. The result is a delicious warm appetizer that everyone enjoys around the camp.
Chef Tips for Perfect Results
Successful campfire cooking requires attention to heat levels and timing to achieve the best outcome.
- Bloom the spices first: Ensure your ground beef is fully cooked and seasoned before layering it. This prevents undercooked meat hidden under the cheese layer later.
- Maintain low heat: Keep the fire at a consistent low to medium level so the chips do not scorch. High heat will burn the edges of the tortilla chips quickly.
- Layer strategically: Place chips first to act as a base and top with cheese directly on the meat. This creates a cheese seal that holds the heat inside the skillet.
- Watch the foil: Do not wrap the foil too tightly as steam needs to escape slightly. Too much steam can make the chips soggy instead of crisp.
- Prep toppings separately: Keep your fresh toppings like sour cream and guacamole cool. Do not cook them or they will lose their fresh texture.
- Check frequently: Open the foil lid slightly every ten minutes to check melt progress. This prevents burning and ensures even heating.
- Drain the grease: Drain all excess fat from the hamburger meat before topping the skillet. Grease can make the chips slide and become oily.
- Serve immediately: Take the dish off the fire once the cheese is melted. Serving it straight from the pan maximizes the gooey texture.
Common Mistakes to Avoid
Avoiding these common errors ensures that your outdoor meal turns out delicious and enjoyable.
| Mistake | Why It Happens | How to Fix It |
|---|---|---|
| Chips Burn Quickly | Fire is too hot or too close to the skillet. | Move the skillet to a cooler spot or lower the fire intensity. |
| Cheese Does Not Melt | The fire heat is insufficient or the lid is open too long. | Cover the skillet tightly with foil during the melting phase. |
| Chips Get Soggy | Excess moisture from sauce or meat juices pools on the chips. | Ensure meat is well drained and use toppings sparingly. |
| Grease Pools Up | Hamburger fat is not drained before assembly. | Drain cooked meat thoroughly on paper towels or in a colander. |
| Toppings Burn | Fresh toppings are left in the direct heat too long. | Add fresh herbs and cream toppings only after removing from heat. |
| Uneven Heat | Skillet sits on uneven logs or rocks outdoors. | Use a grill grate or flat stone to level the skillet placement. |
Variations and Substitutions
You can easily customize this dish to fit various dietary needs or taste preferences.
| Ingredient or Element | Substitution or Variation | Impact on Flavor or Texture |
|---|---|---|
| Ground Meat | Use ground chicken or turkey instead of beef. | Result is lighter with a milder flavor profile overall. |
| Chips | Use corn tortilla strips or baked pita chips. | Provides a different crunch texture but similar base function. |
| Cheese Type | Substitute cheddar for pepper jack cheese. | Increases spice level and adds a smokier flavor note. |
| Jalapeños | Use pickled jalapeño slices instead of fresh. | Adds a tangy vinegar kick to balance the richness. |
| Salsa | Use roasted tomatillo salsa for a green option. | Offers a brighter acidic taste to cut through the dairy. |
| Beans | Add black beans or pinto beans to the meat. | Increases fiber and bulk making it more filling for guests. |
Serving Suggestions and Pairings
This heavy skillet dish pairs well with light sides that offer refreshment.
- Chips and Dip: Serve extra tortilla chips on the side for more crunch.
- Green Salad: A simple wedge salad balances the richness of the cheese.
- Grilled Corn: Street corn adds a sweet and salty element to the meal.
- Guacamole: Freshly made avocado dip adds creaminess and texture contrast.
- Sour Cream: A dollop of cold sour cream cools down the spiciness.
- Beverages: Refreshing lemonade or iced tea complements the warm spices.
- Meat Options: Additional beef or chicken for protein lovers to share.
- Guacamole variations: Mix in roasted tomatoes for extra depth of flavor.
- Hot Sauce: Provide bottles of spicy hot sauce for self-customization.
- Onions: Caramelized onions add sweetness to the savory meat layer.
- Peppers: Sautéed bell peppers enhance the color and crunch of the dish.
- Wedges: Potato wedges make a great potato addition to the spread.
For a complete meal, serve this with a crisp garden salad and a refreshing fruit drink. This combination provides a balanced plate of protein, cheese, and fresh produce for your group. It works best as an appetizer but can pass as a full dinner if plated well.
Make Ahead Options
Yes, you can prepare several components of this dish ahead of time for convenience.
You can chop all vegetables and cook the beef up to 24 hours in advance. Store the meat and vegetables in separate containers in the refrigerator to maintain freshness. This saves significant prep time when you arrive at your camping site.
When you are ready to cook, simply assemble the layers in the cast-iron skillet. The meat and vegetables should be at room temperature before adding them to the heat. This prevents the fire temperature from dropping too much when you add cold ingredients.
Storage and Reheating
Store any leftovers safely to prevent foodborne illness while keeping quality high.
| Method | Duration | Instructions |
|---|---|---|
| Room Temperature | 2 hours max | Keep covered with foil while outside to prevent drying. |
| Refrigerator | 3 to 4 days | Store in an airtight container to maintain freshness and flavor. |
| Freezer | 2 to 3 months | Freeze untopped nachos. Add fresh toppings like dairy after thawing. |
| Reheating | 350 F for 10 minutes | Reheat in an oven to restore crispiness to the chips. |
| Make Ahead | 1 day | Prep meat and toppings a day prior for faster assembly. |
Nutritional Information
Approximate values are based on one serving and may vary depending on exact ingredients and portion size.
| Nutrient | Amount per Serving |
|---|---|
| Calories | 550 |
| Protein | 25 grams |
| Fat | 35 grams |
| Saturated Fat | 15 grams |
| Carbohydrates | 30 grams |
| Fiber | 3 grams |
| Sugar | 2 grams |
| Sodium | 900 mg |
Frequently Asked Questions
Can I substitute the cheese to dairy-free?
Yes, you can use dairy-free cheddar style shreds in this recipe. The melting properties vary so watch the fire closely to avoid burning. This change removes the traditional gooey texture slightly but keeps the flavor intact.
How do I know the hamburger meat is fully cooked?
The hamburger meat should no longer appear pink inside the skillet before assembly. You can use a meat thermometer to ensure it reaches 160 degrees Fahrenheit. Draining the grease immediately helps ensure even cooking before layering.
What if the fire goes out while cooking?
You should move the skillet to a camp stove or hot stove to finish the melting process. Covering the skillet immediately retains heat in case the fire dies. Having a backup heat source ensures the cheese finishes melting properly.
Can I make this for a large crowd?
Yes, you can double the recipe in a larger oven-safe skillet or pan. Ensure you have enough foil to cover the large surface area completely. Cook in batches if the fire cannot support multiple heavy skillets at once.
Is this dish suitable for kids?
Most children enjoy this dish because of the familiar flavors and melted cheese. You can reduce the amount of jalapeño to lower the spice level. Adding extra beans makes it a more filling meal for growing appetites.
How do I store leftovers safely?
Cool the leftovers quickly and refrigerate them within two hours of cooking. Reheat them in the oven to recrisp the tortilla chips properly. Do not microwave them as the chips will become rubbery and soggy.
Conclusion
Campfire Nachos provide a delicious and satisfying meal that everyone will love. The combination of flavors and textures works perfectly for outdoor dining. Making this dish ensures comfort and taste at your next camping trip. Enjoy every bite of these gooey cheesy nachos.
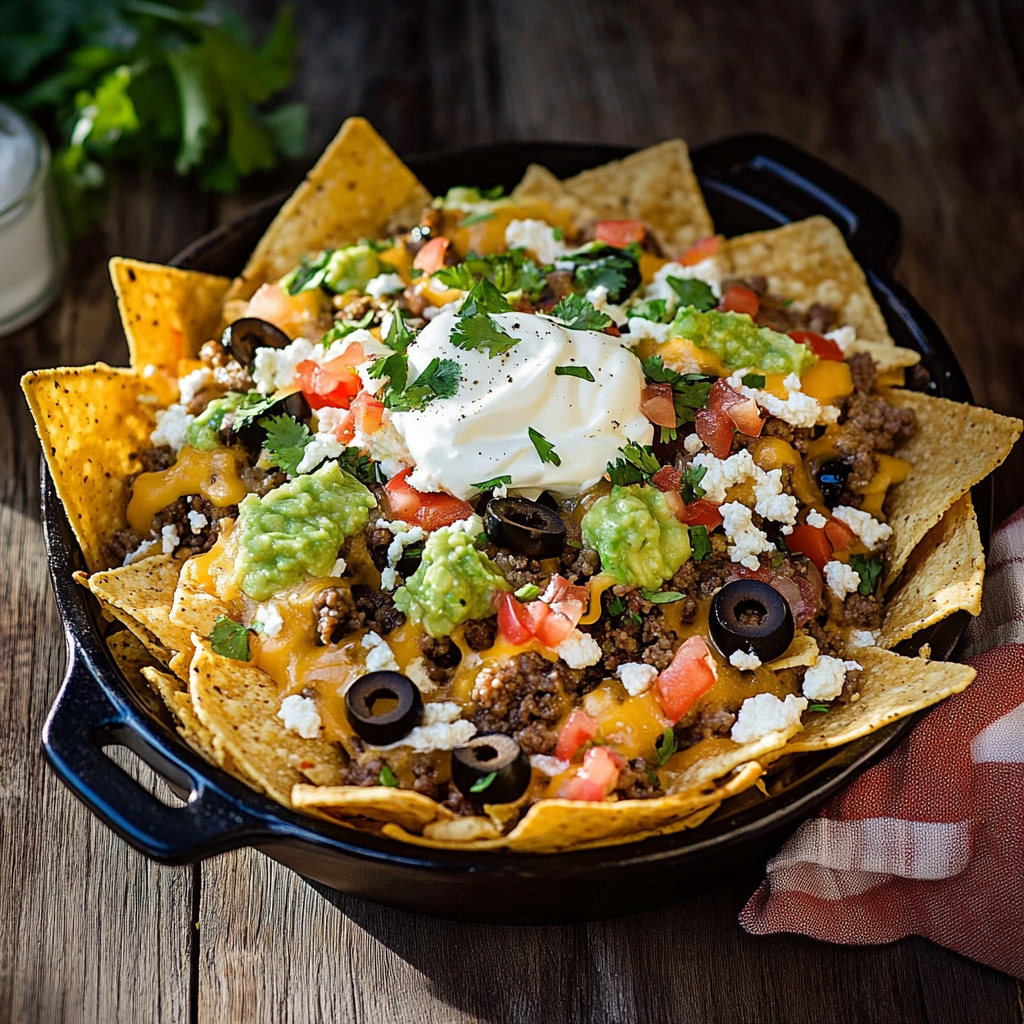
Campfire Nachos Recipe for Outdoor Cooking
Ingredients
Method
- Preheat cast-iron skillet on low heat over fire for 5 minutes
- Add ground beef; cook, breaking up clumps until browned
- Stir in frozen corn and onion; cook 5 minutes
- Layer tortilla chips into skillet
- Sprinkle Cheddar cheese over chips
- Top with cooked beef mixture
- Add jalapeño slices and cilantro
- Cover with aluminum foil; let sit 10 minutes until cheese melts
- Serve with lime, guacamole, and Cotija cheese on top
Nutrition
Notes
To prevent sogginess, keep foil loosely folded
Prep toppings in fireproof container
For cheese consistency, avoid overcooking chips